This is Part 3 of a 15-page tutorial (in three parts) that will show you how to build an heirloom-quality, all-wood chess or checkers board with just a few small pieces of lumber. (Use the page navigation at the bottom of each post to change pages within each part.)
This part covers cutting the inlay through finishing. You can also:
- Go back to Part 1 (6 pages), which covers planning through first layer glue-up.
- Go back to Part 2 (5 pages), which covers cutting the squares through planning this inlay.
- See a gallery of reader-built chess boards here: Reader-built Chess Boards
Cutting the Inlay
Now it’s time to cut the top inside edges of the frame boards to accept the inlay. Fortunately you don’t really need to do any measuring here. We’ll be cutting a groove in the frame for the inlay, and we’ll set the router using the inlay pieces we’ve already prepared. Insert a straight bit into your router, and set the depth to lower than the shortest of your four inlay pieces. In the photo below, I have all four pieces lined up from shortest to tallest, and the bit is set slightly lower than the one in front.
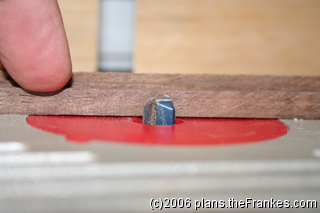
Set the router table fence so that the blade will cut slightly shallower than the thinnest of the inlay pieces. This will be the final width of the inlay on the finished chess board. In the photo below, you can see that the fence is set up so that the router bit would cut into the tiny inlay piece, but not though it.
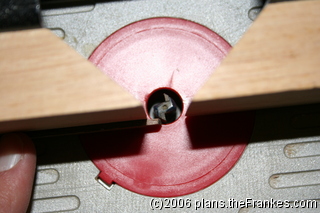
Use a piece of scrap lumber to test the router and table settings. None of the inlay pieces should fit all the way in the grove your router cuts – they should all be just a bit too wide and just a bit too long. This is what you want. Now carefully cut the groove to receive the inlay along the top inside edge of each frame piece. I didn’t take a picture of this part because I was being careful not to cut my fingers off.”
Gluing Up and Trimming the Inlay
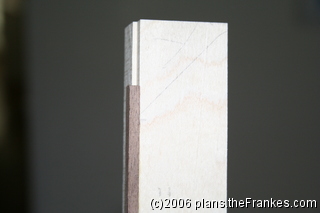
Next, one at a time, position each of the inlay pieces in the groove so that it extends beyond the miter reference lines you drew earlier. In the photo below, you can see the piece “not quite fitting” in thickness, width, or even length, but that it extends beyond the inside of the diagonal used to mark the miter joint.
Using wax paper to protect the pieces from each other, glue up two inlays at a time and clamp the frame pieces together (shown in the following two photos) until the glue sets.
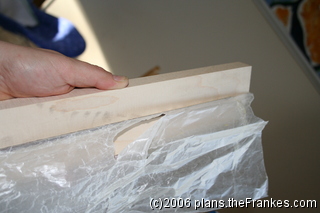
It’s easiest to do two at a time. Because the inlay pieces are a bit oversized, if you turn one frame board upside down and press them face to face, the inlay for each board will be held in place by the other board, as shown below.
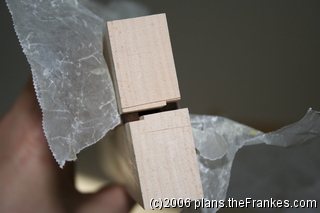
After all the glue has set, use a pattern bit or a plane to trim down the inside edge of the inlay. The inside edge should be the broadest edge of the inlay.
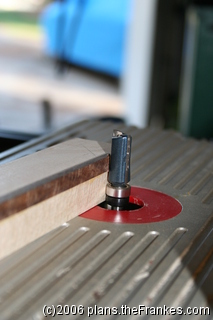
When you’re finished trimming the inside edge, you’ll end up with a very thin bit of inlay that stands slightly proud (above) the face of the board. If necessary, use a sharp hand plane (to prevent chip out) to trim the inlay to just a hair above the face of the board. You’ll be sanding it flat once the frame is glued to the board.
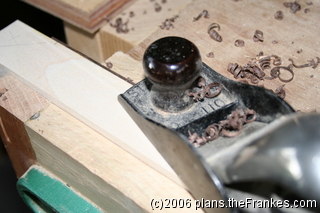
Preparing the Frame
Hold each edge up against the board matching the letters that you drew earlier, and aligning it using the miter reference lines you also drew. Draw three lines across the frame and onto the board to mark the positions of biscuits (plates). You may be tempted to not draw the middle line because it lines up so nicely with the center of the board, but you need to at least draw the mating line on the frame.
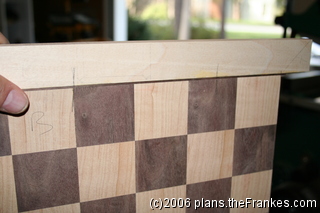
Cut slots for biscuits (plates) all the way around the board.
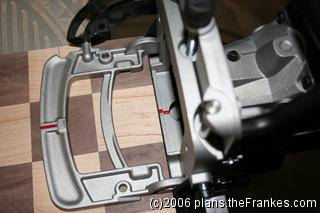
Then cut slots on all the frame pieces. This is why you needed to trim the inlay very close to the board itself.
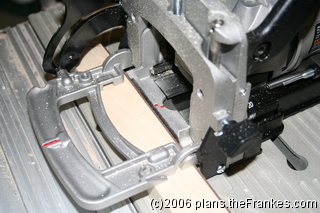
If you have a biscuit jointer that’s capable of cutting face frame biscuits (FF size), then you may want to make cut additional slots for the corners after you miter the edges. Be sure the frame is wide enough for an FF biscuit!
Mitering the Frame
Starting with Side A (you labeled them with letters, right?), work your way around the board, one side at a time. I use the crosscut sled and the base of a combination square to make these cuts. Attach sandpaper to the faces of the square to keep it from slipping.
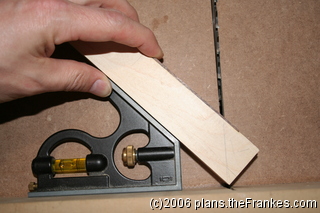
Be sure the outside edges of the miters are nice and sharp when you cut.
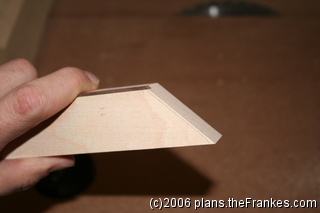
Cut the first side of the first frame piece (Side A), then cut the mating side of the adjacent piece (probably Side B), making very fine adjustments if necessary and test-fitting it until the joint fits perfectly.
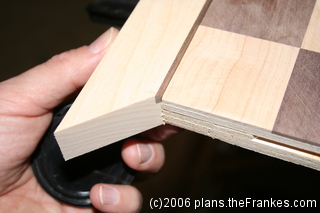
Then move on to the other side of Side B. Double check the placement of your reference line by holding the first joint (A-B) together against the board and checking the length of side B against the length of the board. Make a new mark if necessary to indicate the required length of the cut.
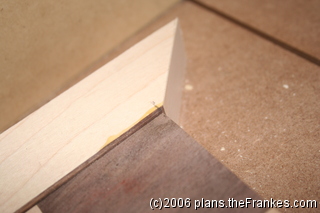
Cut it a hair long at first, and then “nibble away” until the inside edge of Side B is exactly the length of the Side B of the board. Then move on to the mating side of the adjacent piece (probably Side C), and continue around the board until you’ve trimmed the opposite end of Side A. Now that you have all the miters cut, you can add slots for face frame biscuits (FF size) if you want and if the boards are wide enough to fit.
Gluing Up the Frame
Before you use any glue, add biscuits to all the slots and completely assemble the board. This serves two purposes. First, this dry fit will ensure that all your miters are cut perfectly, and second, it will serve to perfectly align all the frame pieces as you glue them up one piece at a time.
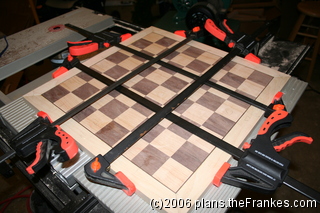
Once the board is dry fitted and clamped tightly, remove a couple of the clamps and carefully pull off the first side. Be sure the other clamps are still tight.
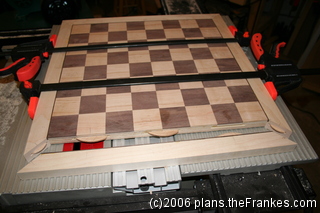
Add glue to the slots, place the biscuits, and add glue to the side only – NOT the mitered edges. (By the way, you can see from these photos that I used face frame biscuits on the mitered corners.)
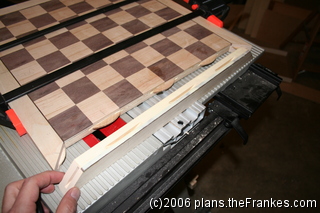
Then tightly clamp the piece back into position against the board. The two adjacent sides (if clamped tightly) will keep this side perfectly aligned on the board. Once the glue has set a bit, do the same with the opposite side, again keeping the glue off of the mitered corners so you don’t accidentally fasten the unglued sides. Refasten the clamps snugly and let the glue dry for a couple of hours.
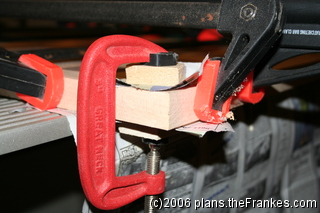
Finally, remove the clamps holding together the unglued sides, apply glue to all the slots and edges (including the mitered corners), and re-clamp. You can do both of these at the same time. It may be helpful to apply C-clamps with cauls to the mitered joints to be sure they line up perfectly.
Finishing the Chess Board
Once all the glue has dried it’s time for the final sanding and finishing. Start with 100 grit paper (or 80 if necessary) on a random orbital sander and flatten the surface. Then move through 120, 150, and 180 grits, removing the visible scratches from the previous grit with each new grit. Finally, use a sanding block with 220 grit paper for your final finish sanding with the grain of the wood. A good way to check for flatness and remaining scratches is to look across the board with a bright light (or the outdoors in my case) shining behind it.
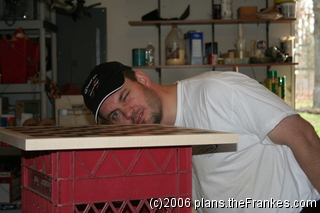
Clean the chess board carefully to be sure it’s free of dust, and then place it on a milk crate or some other platform that will allow you to apply the finish all around.
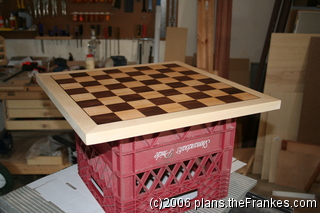
I prefer Tung oil finish, but you can use whatever you like. I apply three coats of Tung oil finish, allowing time for the oil to soak in and dry between coats. After the Tung oil, I wait a good 24 hours for the oil to harden before I add a thin wax finish with a clean all-cotton cloth, working with the grain. Apply the finish to the bottom of the frame as well. Sign your name and date the plywood in the middle so there’s no doubt who built the chess board. A wax finish needs to be buffed, and that’s something my son has gotten pretty good at. (I know, the plant in the background looks like it’s dead, but I assure you: It is in fact impossible to kill.)
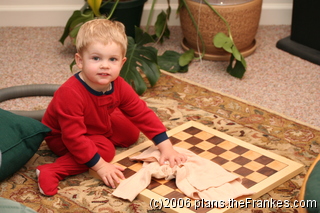
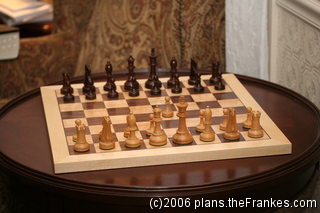
Next, cut a piece of green felt (or whatever color you desire) about an inch smaller than the chess board, apply glue, center it, and attach it to the bottom of the board. The felt will cover your signature, but that’s okay – you know the secret. Finally, add the pieces and start to play! King’s pawn to e4. Your move.
Some Technical Details
The photos were taken with a Canon EOS Digital Rebel XT, with either the kit lens or the EF-S 60 Macro, and sometimes using either Speedlite 550EX or the Speedlite 430EX flash. The images were created in batch using ImageMagick, launched as follows: convert *.JPG[320x320] -gravity SouthEast -font Arial -pointsize 12 -fill black -annotate +2+2 "(c)2006 plans.theFrankes.com" -fill white -annotate +3+3 "(c)2006 plans.theFrankes.com" chess%03d.jpg
This is the End of Part 3 and the end of the tutorial. You can:

Re. How to build a Checker Board. How do I print the plans without useing print page?
Thanks for the tip — I added a “Print” icon to the top of the posts that will allow you to print the entire post.
Thanks for the great site. I have finished applying the oil and am now ready to apply the “wax”. Not sure what you use for this step, please advise as to what wax to buy as there are a myriad of waxes available and I am not sure what to use. Thanks again for the guidance.
I use Briwax usually, but any type of wax finish would probably look nice — remember that you only need a little. I apply it with a clean cotton cloth (not blended or synthetic fabric), and buff it briskly with the same cloth once it has dried. I also give the oil finish plenty of time to dry before applying the wax.
I’d love to see some pictures when you’re finished!
To be clear, I noticed that I used 0-0-0-0 steel wool in this tutorial. I’ve since changed to using a cotton cloth, and I’ll update the tutorial to reflect that.
Well the project is completed except for having to really work the wax, I am assuming because I applied to much as one can see the swirls where the wax was applied. How do I send pictures as requested? I do not see a way to attach to this comment? Thanks again for your site.
Excellent! Yes, the swirls are usually caused by using too much wax. You only need a very little bit of the wax. I’ll send you my email address for the photos, and I’ll add them to the site. Thanks — I’m looking forward to seeing your work!
Fantastic explaination and detailed instructions. I have made a few chessboards and all of them have warped or moved or split. Though each one was better than the last I was stumped as to how best to over come the movement. Cannot wait to try your method. Thank you for your efforts.
Great way to make a chess set. Thanks. I am going to buy hand carve pieces from India that are really done with great artistic ability. May be some day I will have enough skill and courage to carve them myself. I don’t have a biscuit cutter. Is there a way to do it some other way? I am just putting together my wood shop. I am retired and will devote my time to wood working and playing chess. I am just a kid. I am 81 years young.
That’s just awesome — I wish I could do that! You don’t *need* a biscuit joiner, but they sure do come in handy for so many things. You can just glue the edges or use dowels, but those are often a little trickier to line up. I’d love to post some pictures of your board when you’re finished!